Graylog (https://www.graylog.org) is a software for logs management.
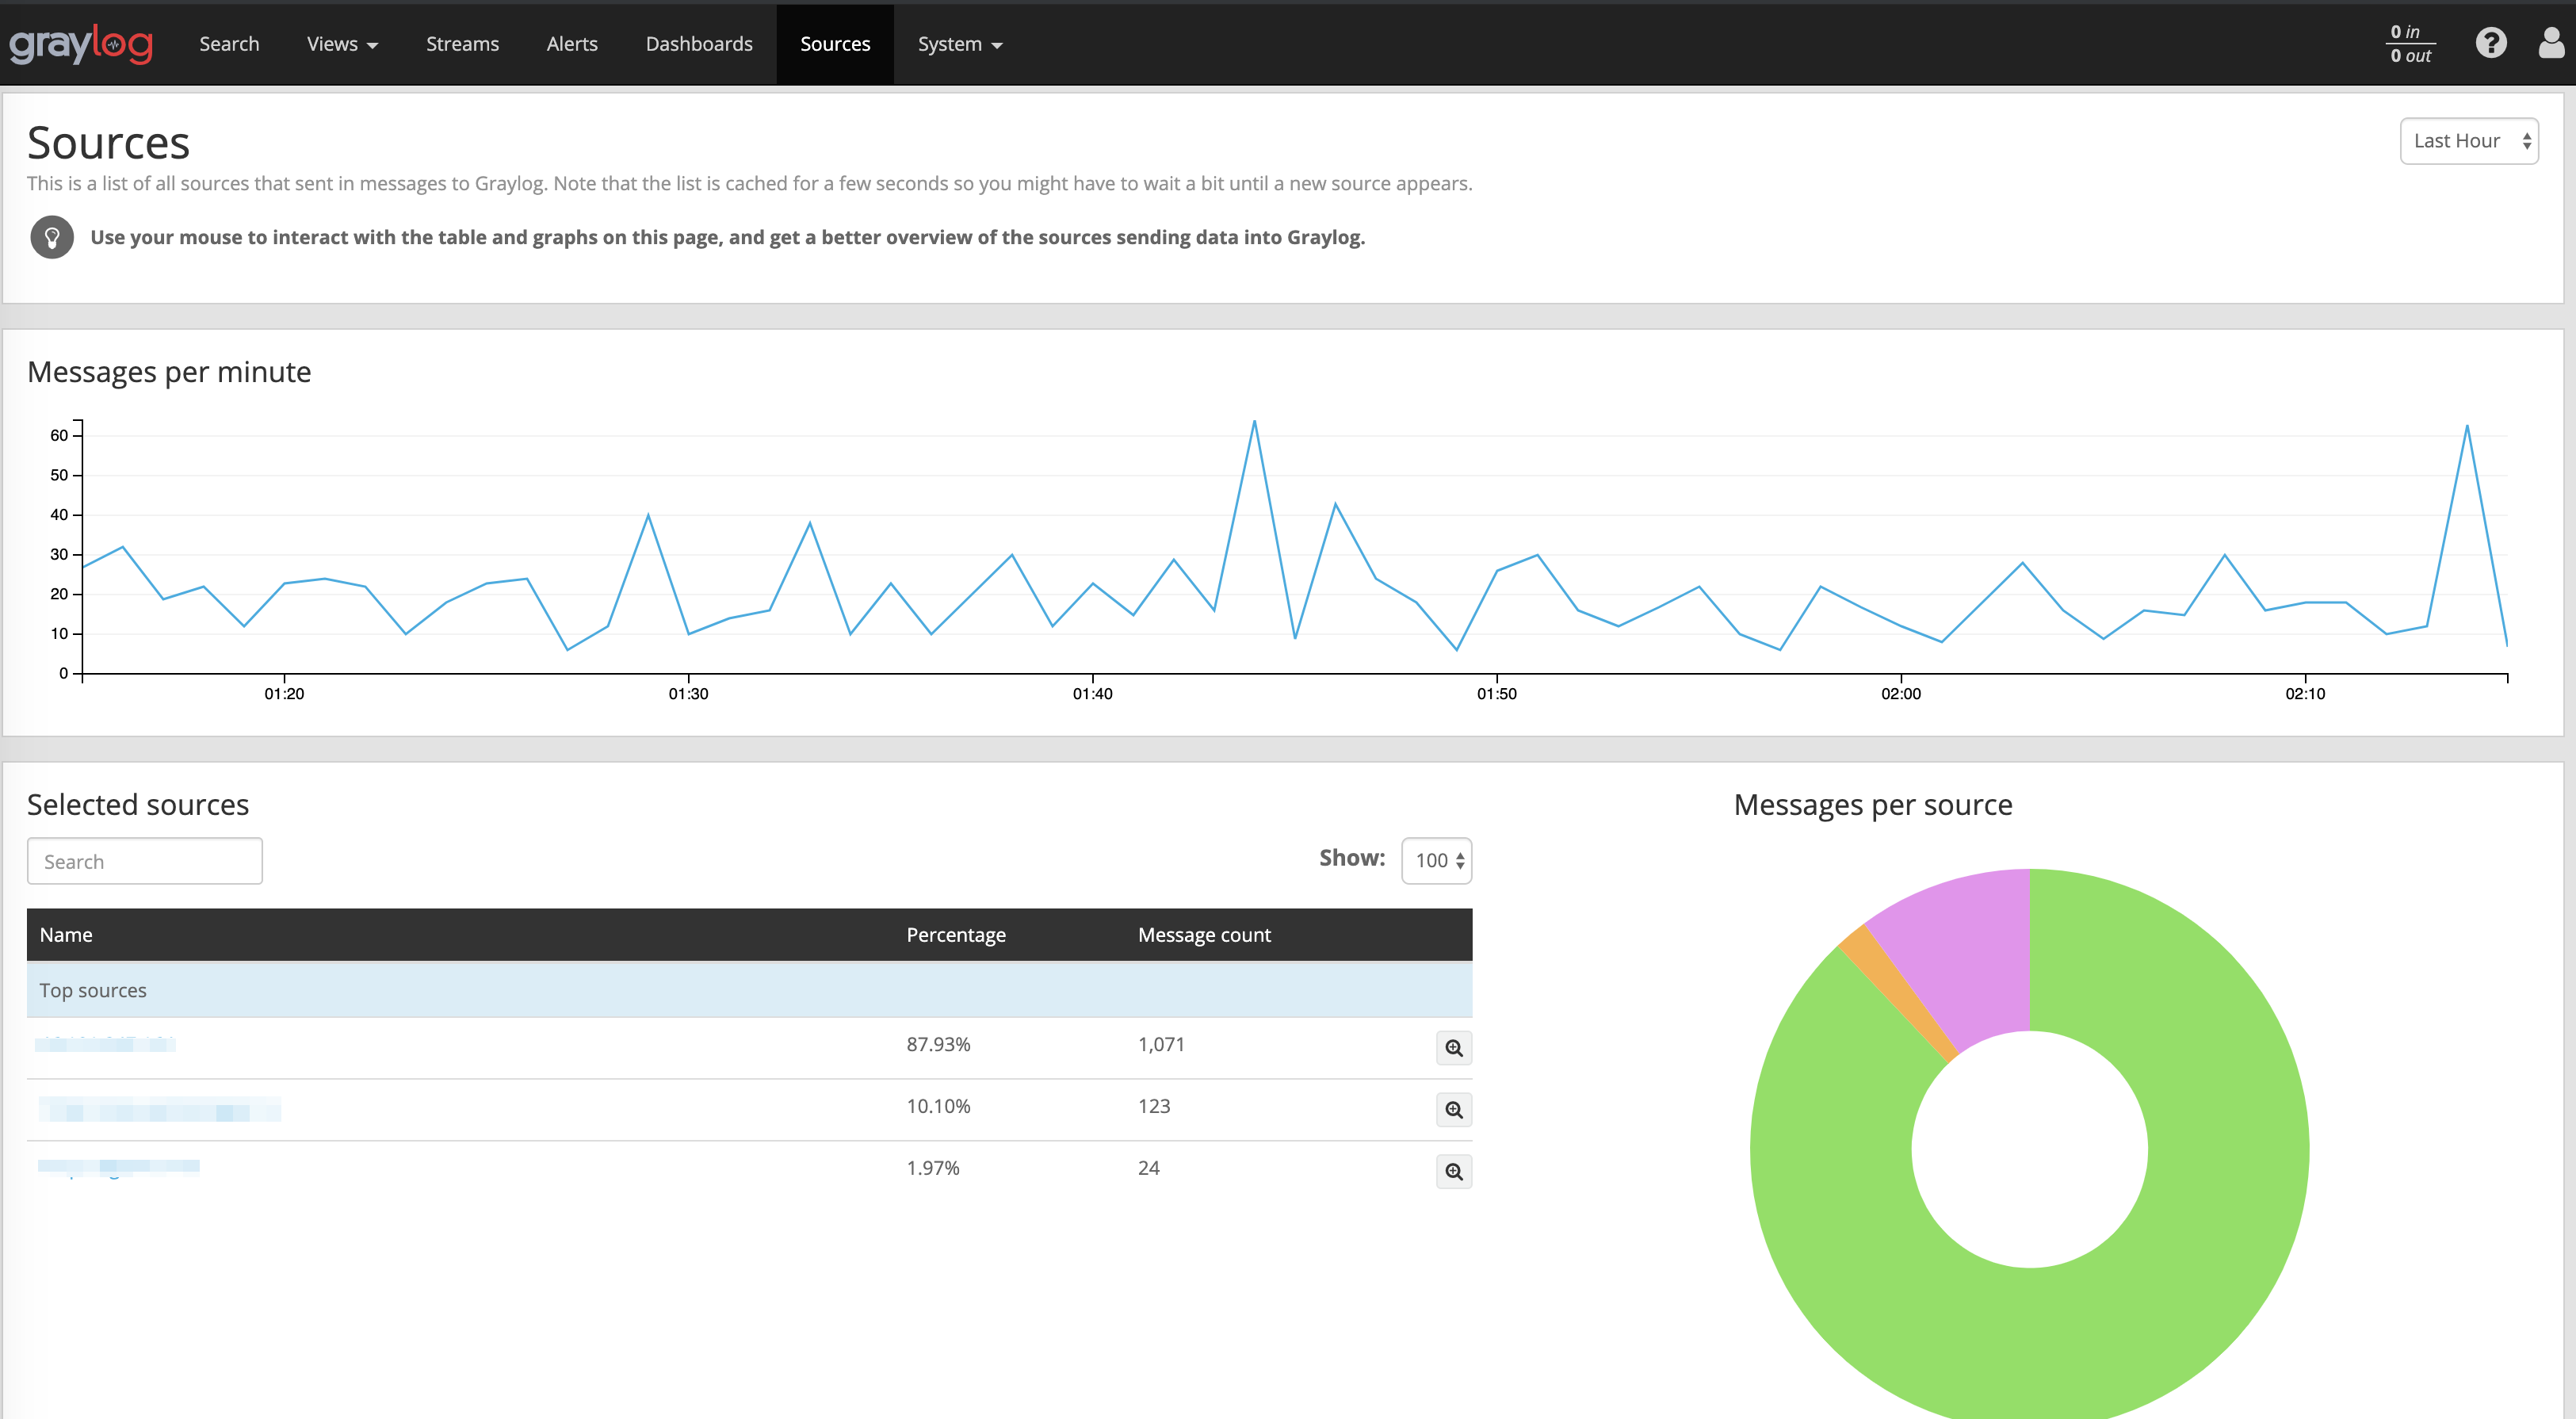
In other words - you can redirect your apps logs, custom logs, to Graylog and control everything from one place with useful charts, dashboards, stats etc
Configure your Rails app
First - add gems:
gem "gelf"
gem "lograge"
gem "sidekiq-gelf"
Run:
bundle install
Next - configure your logs redirect in production.rb:
config.lograge.enabled = true
config.lograge.formatter = Lograge::Formatters::Graylog2.new
config.logger = GELF::Logger.new("XX.XX.XX.XX", 12201, "WAN", { :facility => "hostname", :host => "https://url.com" })
config.colorize_logging = false
Install and configure Graylog
We should install ElasticSearch and MongoDB before Graylog installation.
Let’s update and add new packages to your system:
sudo apt update && sudo apt upgrade
sudo apt install openjdk-8-jre pwgen uuid-runtime apt-transport-https
sudo apt-key adv —keyserver hkp://keyserver.ubuntu.com:80 —recv  9DA31620334BD75D9DCB49F368818C72E52529D4
echo "deb [ arch=amd64 ] https://repo.mongodb.org/apt/ubuntu bionic/mongodb-org/4.0 multiverse" | sudo tee /etc/apt/sources.list.d/mongodb-org-4.0.list
Update packages index and install MongoDB
Simple as usual:
apt-get update
sudo apt install -y mongodb-org
Enable and start system services for MongoDB:
sudo systemctl start mongod
sudo systemctl enable mongod
Add packages and install ElasticSearch
Make sure what you have JRE (Java) installed on your machine (check first step), check your distro docs for the latest version.
Also, keep in mind what sometimes you need to adjust Java Heap memory usage in ES configuration files, check logs for any errors after installation.
Let’s move forward and install ElasticSearch:
wget -qO - https://artifacts.elastic.co/GPG-KEY-elasticsearch | sudo apt-key add -
echo "deb https://artifacts.elastic.co/packages/5.x/apt stable main" | sudo tee -a /etc/apt/sources.list.d/elastic-5.x.list
sudo apt update && sudo apt install elasticsearch
Enable and start system services for ES:
sudo systemctl start elasticsearch
sudo systemctl enable elasticsearch
Installing Graylog
Download repo package for Graylog (maybe better to download latest version 3) and install it:
wget https://packages.graylog2.org/repo/packages/graylog-2.4-repository_latest.deb
sudo dpkg -i graylog-2.4-repository_latest.deb
sudo apt update && sudo apt install graylog-server
Enable and start system services for Graylog:
sudo systemctl enable graylog-server.service
sudo systemctl start graylog-server.service
Configure password and salt and add generated hashes into your Graylog configuration file (usually in /etc/graylog-XXX):
echo -n "Enter Password: " && head -1 </dev/stdin | tr -d '\n' | sha256sum | cut -d" " -f1
pwgen -N 1 -s 96
Restart your Graylog instance:
sudo systemctl enable graylog-server.service
sudo systemctl start graylog-server.service
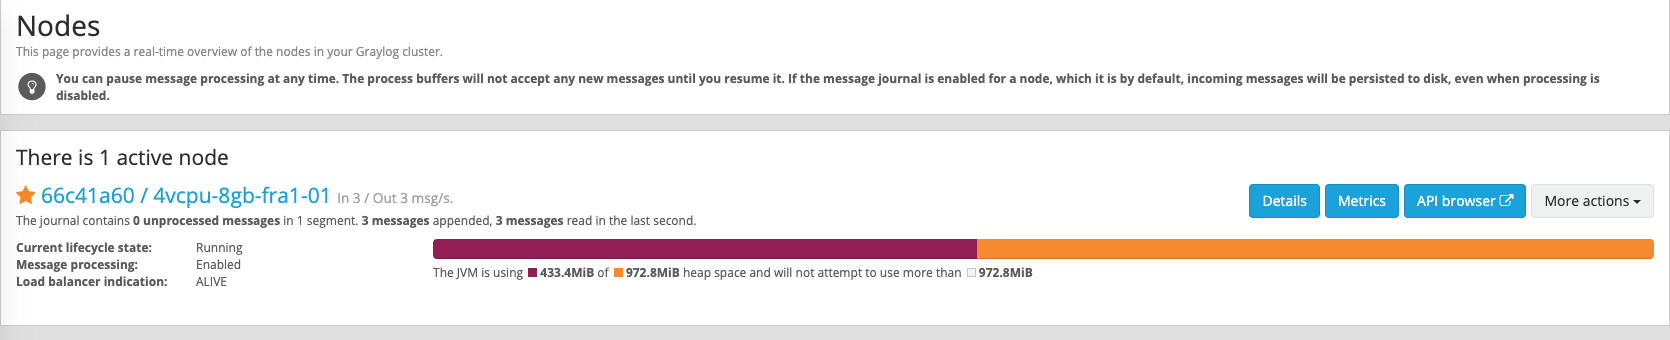
Access your http://graylog-server-ip:9000 and check active nodes:
Graylog configuration
Add GELF UDP based INPUT:

Wait for messages, they are should arrive in a minutes:
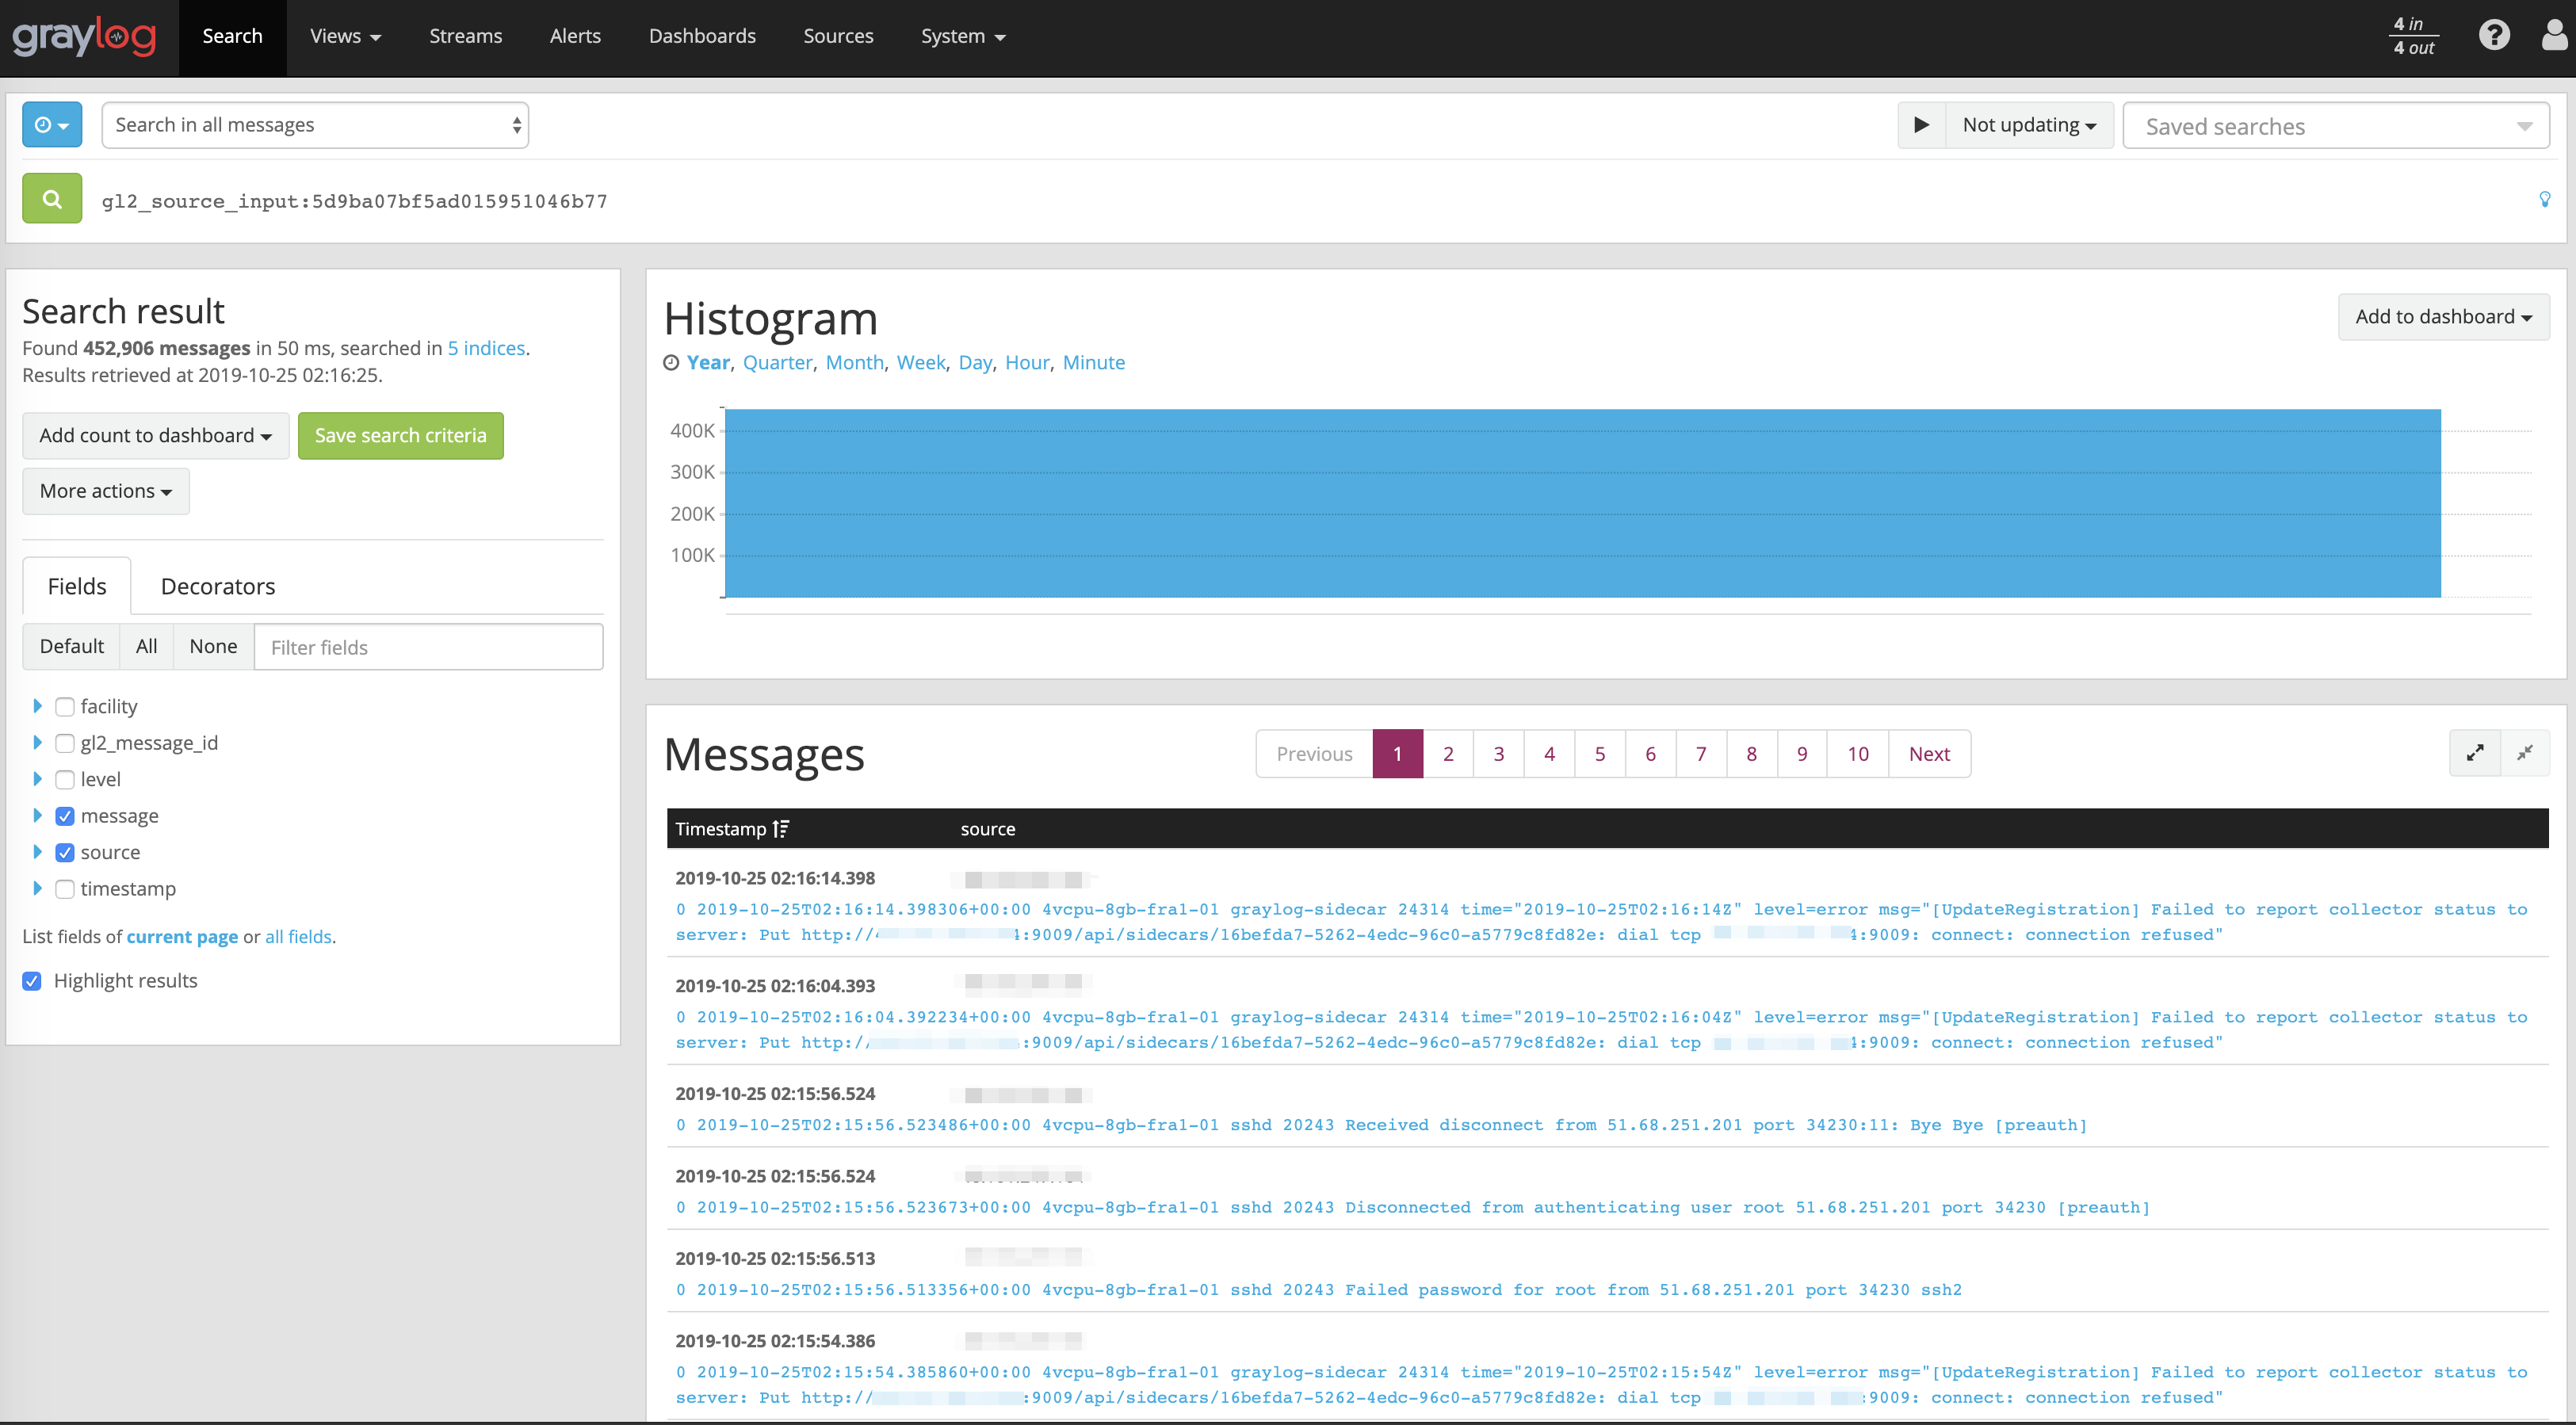
Check details for each message:

Bonus points - setup your custom dashboards and filters!
In next articles I’ll show you how to monitor logs from custom directory with Graylog Sidecars.
Stay tuned!